Thursday, October 2, 2014

Amazing Women: Helping Women with Cancer

In a recent blog post, I wrote about some remarkable women from the Searsport, Maine area who  were planning to get together to sew scarves for cancer patients in Augusta.
 
Well . . . they did!

The "Sewing Party" was hosted by Kendra. a woman I met at Fiber College. Thanks to Kendra and her friends, the legacy "My Sister's Scarves" will live on and benefit women with cancer in mid-coast Maine.

Kendra emailed to tell me that she wanted to help with the scarf project in honor of her sister-in-law, who has been battling cancer for six years.
 

So she invited over fourteen (!!!) of her closest friends . . .
and their sewing machines . . .

Put out some refreshments . . .
 
And got busy!


In just two hours, this industrious group completed 42 scarves!
(If you and your friends would like to make some, the pattern is here.)


Kendra reports that they had so much fun, they want to do it again.
(They're accepting donations of cotton fabrics if anyone would like to help out; you can contact me and I'll get it up to them).
 

In the e-mail in which she sent me these photos, Kendra told me a story I wanted to share.
 
 
 She wrote, "I wanted to tell you.  I have a daughter who was sleeping when everything started  ~~ when she came downstairs she started crying  because the scene (of all the women sewing scarves) touched her so much."

 
I love the clever way the ladies decided to show off their finished scarves . . .
where else on a gorgeous September day in Maine but on the clothesline behind the barn?
 
 
I think they look pretty happy to have finished . . . especially Kendra...
She's the one celebrating in the front of the group.
 

I just received this in the mail (literally . . . while I was typing this post) :
 
 
Isn't it amazing how women just help each other out, without being asked?
 

Sewing in memory of . . .

My dear friend, Diana
Breast Cancer
1941 - 2010
 
My sister, Nancy
Ovarian Cancer
1952 - 2010
 
 
This post is linked to:
Wow Us Wednesdays at Savvy Southern Style
Time Travel Thursday at Brambleberry Cottage
What's It Wednesday at Ivy & Elephants
I Quilt Thursdays at Pretty Bobbins
Needle & Thread Thursday at My Quilt Inspiration
Tablescape Thursday at Between Naps on the Porch
Wow Me Wednesday at Ginger Snap Crafts
Show & Tell Friday at My Romantic Home
Feathered Nest Friday at French Country Cottage
Craftastic Monday at Sew Can Do
Nifty Thrifty Tuesday at Cozy Little House


Monday, September 29, 2014

Needle Felting 102: Dance Like Nobody's Watching

With my witch completed, I signed up for a second needle felting class with Kathleen Gerdes at Fiber College . . . this one on making a needle felted wall hanging rather than a 3-dimensional object. The class was called "Dance Like No One's Watching". Just the title alone made me want to sign up!

 
 Here is our inspiration piece, Kathleen's dancing woman, kickin' it up in her red shoes!


 The wall hangings can be made with tabs to hang on a dowel or branch, or with a hidden casing on the back for hanging.


There was no pattern - just the inspiration piece - so each of our completed dancing ladies was unique.  After just three hours on a beautiful September afternoon, here we are with our finished products.
 

Here's my wall hanging; I'm really pleased with it. It's already living on my bedroom wall as a daily reminder not to take life too seriously . . . and dance while I still can.


"Life isn't about waiting for the storm to pass, it's about learning to dance in the rain."
(in red shoes, of course!)


And here is Kathleen, who turned us into fiber artists in no time!
 
 This is another of Kathleen's needle felted wall hangings. This one is on display at Port Fiber, a "laniferous and splendiferous fiberarts shop" in Portland, Maine, where Kathleen teaches.


And here we are, Kathleen and I . . .accidental neighbors here in Falmouth, and now, fiber friends!


If you've never tried needle felting, you might want to give it a try. . . so much fun and neither difficult nor expensive to begin. There are lots of ideas on Pinterest to get your creative juices flowing.
 
 
I hope you dance!
 
 
This post is happily linked to:
Metamorphosis Monday at Between Naps On the Porch
Inspire Me Monday at My Uncommon Slice of Suburbia
Show & Share Tuesday at Coastal Charm
Inspire Me Tuesday at A Stroll Through Life
Wow Us Wednesday at Savvy Southern Style
Tablescape Thursday at Between Naps on the Porch
Show & Tell Friday at My Romantic Home
 Feathered Nest Friday at French Country Cottage
Craftastic Monday at Sew Can Do


Monday, September 22, 2014

The 150 Project #4: Tired of Rubber Chicken?

Posting my progress on the "150 Project " (my goal weight on Weight Watchers) is my way of keeping myself honest, tracking progress, and, just maybe, inspiring others because...if I can do it, anyone can!

This recipe is the best thing since sliced bread. No more dry baked chicken breasts at our house. We tried making them exactly as written and the chicken came out perfect . . . so moist. In case there are other women out there who somehow missed this trick for cooking chicken, I wanted to share. Delicious!
 
 
How To Cook Moist & Tender Chicken Breasts Every Time

Ingredients

1 to 4 boneless skinless chicken breasts, of similar size
Salt and freshly ground black pepper
1 tablespoon olive oil, unsalted butter, or combination of both 
Any seasonings you like (we used garlic)  

Equipment

Heavy Mason jar or wide drinking glass
Wide (10-inch) sauté pan with lid
Tongs or spatula 

Instructions

  1. Flatten the chicken breasts: Pound the chicken breasts to an even thickness with the bottom of a wide jar or glass. You can also (carefully!) use the handle of a heavy chef's knife.
  2. Season the chicken breasts: Lightly salt and pepper the chicken breasts. Add seasonings.
  3. Prepare the pan: Heat the sauté pan over medium-high heat. When it is quite hot, add the olive oil (or butter, if using). Swirl the pan so it is lightly covered with the olive oil.
  4. Cook the chicken breasts for 1 minute without moving: Turn the heat to medium. Add the chicken breasts. Cook for just about 1 minute to help them get a little golden on one side (you are not actually searing or browning them).
  5. Flip the chicken breasts: Then flip each chicken breast over.
  6. Turn the heat down to low: Turn the heat to low.
  7. Cover the pan and cook on low for 10 minutes. Cover with a tight-fitting lid. Set a timer for 10 minutes, and walk away. Do not lift the lid; do not peek.
  8. Turn off the heat and let sit for an additional 10 minutes: After 10 minutes have elapsed, turn off the heat. (If you have an electric stove, remove the pan from the heat.) Reset the timer for 10 minutes and leave the chicken breasts in the pan. Again, do not lift the lid; do not peek.
  9. Remove lid and take temperature: After the 10 minutes are up, take the lid off, and your chicken is done. Make sure there is no pink in the middle of the chicken breasts. If you want to be absolutely sure it is cooked, you can use an instant-read thermometer to check (the chicken should be at least 165°F). Slice and eat. Store any leftovers in a covered container in the refrigerator.
 
As Weight Watchers, we eat lots of chicken breasts at our house and often prepare them in advance to use on salads all week. I'm glad to have finally learned how to cook them!
 
Enjoy . . .


Today's "150 Project" Stats:
Weight - way over my goal after summer, but back on track
Exercise - 4 x week with trainer Ben at Body by John
Muscles - sore but stronger!
 

Friday, September 19, 2014

Needle Felting 101: Halloween Witch

I took two needle felting classes at Fiber College with felter-extraordinaire, Kathleen Gerdes (who just happens to live in the same town as me, though we had never met). The first class taught us how to felt in 3-D to make figures. We each made a pretty scary looking Halloween witch.


I've never done needle felting before and was so excited to see all that you can do once you learn some basic techniques. I love these pumpkins (and wormy apple!) that Kathleen made. They would be a great way to use up little bits of leftover wool batting.


Kathleen taught both of the felting classes at Fiber College; she also teaches needle felting at Port Fiber on Cove St. in Portland (right behind the U-Haul building on Marginal Way).
 

Not many materials are required for needle felting. You need some wool batting . . .
 
in whatever colors you want to use for your project.

You also need a foam felting pad and a few needles and you're good to go . . . at least for a beginner like me.

The actual felting was easy and all that pounding was a great stress-reliever!

The witch was basically done by shaping the wool in our hands and then needle felting (punching) it. You even bind the pieces together (e.g. head to body) by repeatedly punching the wool where you want them to join. You add additional colors the same way.
 

 I can do this!!!
Here's my finished witch . . . wart and all.
 
 
One caution: felting needles are very sharp, as most of us "newbies" found out the hard way.
 
I saw a cute idea for storing the needles safely on Pinterest so made a final stop at the dollar store and . . . voila!
photo courtesy of Pinterest at this link
In less than three hours, here is the Fiber College group with our finished witches.
 

This is my kind of project . . . fast and fun. I've already been to Port Fiber to ogle the wool and buy needles. I also bought two books chock full of felting projects.
 
Thanks, Kathleen . . . I can't wait to get started!


p.s. Here are links to two posts and photos of Fiber College from two fellow FC bloggers...hope you enjoy them. Nan's post is linked here and Gale's here. It's interesting to read different takes on the same event. Loved Gale's description of Fiber College as "quirkily wonderful" . . .perfect!

This post is felted to:
Party Junk at Funky Junk Interiors
Show & Tell Friday at My Romantic Home
Motivate Me Monday at Keeping It Simple

Thursday, September 18, 2014

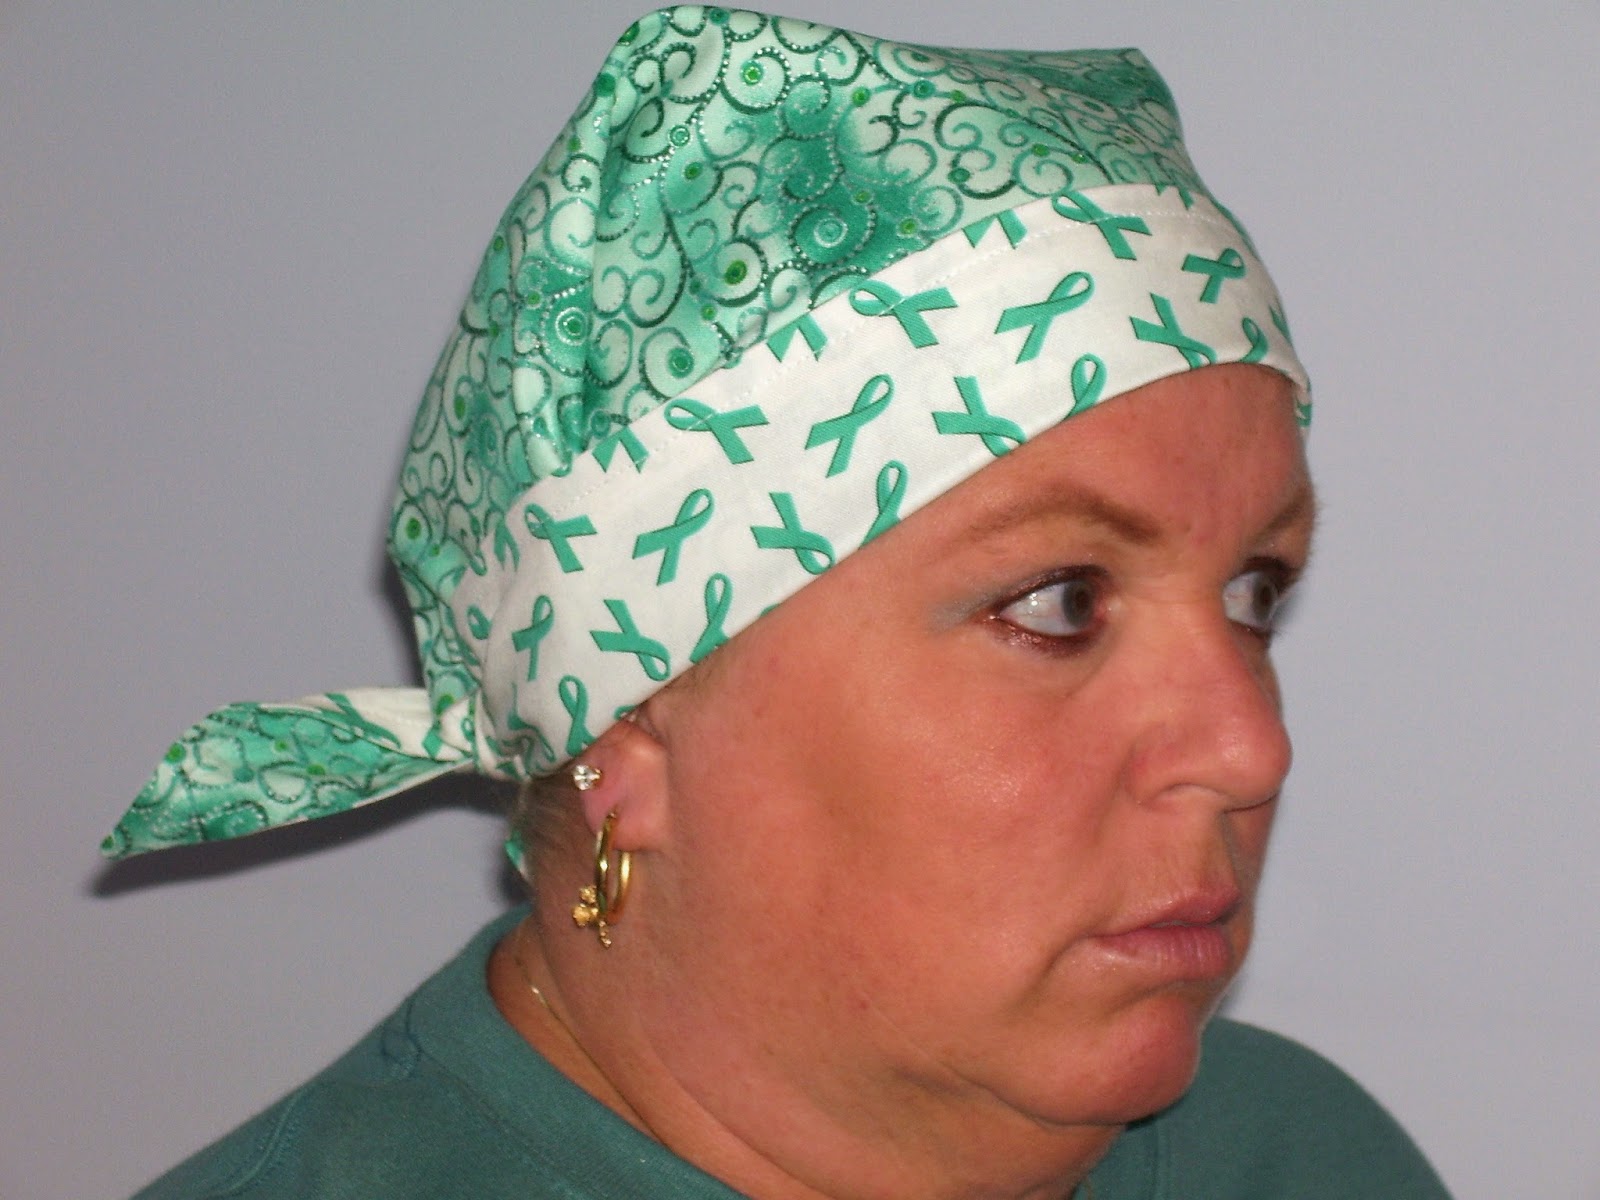
Chemo Scarf Pattern

I was overwhelmed by the response to my September 14th post about sewing "Nancy's scarves" for cancer patients. So many of you have asked for the pattern that I'm posting it here.
Feel free to share.

Cut a pattern out of newspaper or craft paper. Pattern is an isosceles triangle 29-1/4" long on one side and 20-1/2" long on the other 2 sides. 5/8 seam is allowed in the pattern.
Here's my well-used pattern . . . coffee spills and all!
Since the scarf is reversible, for each scarf you will be will be cutting the pattern twice - once from each of two coordinating fabrics. Be sure to place on the fold of the fabric when cutting out.


Sew the two scarf pieces together, right sides together. Leave an opening for turning. Turn the scarf right side out and press. Topstitch 1/4 to 3/8 inch from the edge and you're done!


My sister was such a good sport about modeling for me!
Since Nancy was a 3rd/4th grade teacher, I made her scarves for every holiday. The kids loved them. Here she is in her Halloween scarf  . . . so many happy memories, yet my eyes still tear up.

Occasionally, Nancy would just wear this to make the kids laugh!
 
I don't have a pattern for the Mickey Mouse hat so we'll all just have to stick to sewing scarves!
 
If you would like to learn about ovarian cancer, you can read Nancy's story, in her own words, here.
Thanks to each of you for doing this in memory of Nancy and all of our "sisters" who have been touched by cancer. 
 
Happy Sewing!
 
 
 This post is gratefully linked to:
I Quilt at Pretty Bobbins
Needle & Thread Thursday at My Quilt Infatuation
Tutorial Tuesday at Hope Studios
Related Posts Plugin for WordPress, Blogger...