Showing posts with label renovating. Show all posts

Wednesday, January 9, 2019

Procrastination

Happy New Year from Maine! I haven't posted for almost two months and I apologize to my few, but loyal, blog friends. I love to write, take photos, decorate, or go on adventures and blog about them and I've missed doing it. I promise to do better in 2019!

Winter has arrived here in coastal Maine but it has been mild so far. This is our street; across from it is beautiful Casco Bay, which leads to the Atlantic Ocean near Portland (the "other" Portland!)

With my stair project done, you'd think I would have taken a break but . . . you'd be wrong. The stairs came out so good sans wall-to-wall carpet that I plowed right ahead and started on the second floor, which houses my craft room, our master suite, and a second-floor laundry.


Which required squeezing every bit of furniture, clothing, and decor into the laundry room and bathroom while we worked on the floors. What a mess!


Here is a "before"picture of our master before the icky old aqua carpet was removed. 


We replaced it with red oak flooring. It was quite a learning process for me as there are so many new flooring products on the market today. I had no idea about the virtues of vinyl planks vs. engineered hardwood vs. laminate and so on.  After lots of research and speaking with helpful professionals,  we chose red oak engineered hardwood to compliment the floors downstairs.


We did have the flooring professionally installed and it looks beautiful. What a change!
 Here it is in my craft room, one side . . . 

And the other.


When  the floors were done, I decided to add some curtains to the craft room. I love how "boho" and unexpected these are, with their mix of colors and textures.


And since I've been reading at my craft table (and I LOVE to read), I treated myself to my very own reading corner in the newly-floored craft room. I had the lamp, bought a little C-table at Home Goods for my books, and ordered the chaise from Wayfair.  FYI: This was my first purchase from Wayfair and I couldn't be more pleased; they sent free fabric samples when I was deciding on the fabric and shipping was free and fast. If you've never seen my craft room, here's a link to a post I did about it. I spend most of my time in this room!


By the time the second floor was back together, it was Thanksgiving. Literally. I love these little bottle-brush turkey place card holders I found at Home Goods. Only $1.99 each. I gave them to my sister as a hostess gift on Thanksgiving Day. Heck, she was doing the cooking this year!


We  had barely finished all the Thanksgiving leftovers when the Christmas season got started. The first two weekends in December are "Christmas Prelude" in Kennebunkport , a great time for Christmas shopping, fireworks, and catching up with old friends.


Speaking of Kennebunkport, I have to acknowledge the passing of President Bush #41. He will be missed by all of us who he considered his neighbors. I am a liberal Democrat but knew him to be an exceptionally honest and caring man. He will be missed.


And then it was Christmas . . . .


I spent all my time making Christmas gifts and not enough of it working on my blog. 
I love this stamp. I had it made at Staples and use it to make my own gift tags, gift bags, gift wrap and Christmas cards on plain brown paper. Simple to wrap or embellish with plain old garden twine.


I found these vintage Bingo cards at an antique shop in North Carolina last March. 


With some cut and paste and a little ribbon, they made tree ornaments, a holiday banner for our fireplace, and Christmas cards for special friends.


I posted Tips for Stenciling Flour Sack Towels in August and, between then and December 25th, completed 46 (OMG!) of them to give as Christmas gifts. I found images I liked on the Internet and cut my own stencils on Mylar using an Exacto knife. 


                    The Kitchenaide mixer stencil took awhile to cut out but it's my favorite.
                                      Whew! No wonder I didn't have time left to blog!


             And then there were the driftwood Christmas trees to finish . . . 

Homemade Maine Christmas folk art with driftwood collected in Searsport, Maine.


But on Christmas morning, all of the preparation was worth it.


After Christmas Day, a walk on Wells Beach was exactly what was needed to center myself again.

For the New Year, I decided to go crazy and cut off all my hair. Really!
Here we are before; halfway before anyway . . . 


And after. 
Short, sassy, and oh so easy!

And, ever the optimist, I rejoined Weight Watchers AND Planet Fitness for 2019. 
Hope springs eternal!

Last weekend, we had a great day outdoors at the farm of our friends Survivor Bob and Peg Crowley in nearby Durham, Maine.  

The occasion was the Crowley's annual "Christmas Tree Burning Party".

So much fun and so nice to be outdoors on a mild winter's day .


Which brings me to today.
I think we're actually caught up.
I promise to be less of a blog-procrastinator in 2019.

Happy New Year!


Friday, November 6, 2015

Ugly Chair Makeovers

This is the first time I've actually purchased a copy of HGTV Magazine. I think I was subconsciously protesting their new TV format which seems to feature much more house hunting than decorating. But, there's always a first time. I was attracted to the current issue (November 2015) because of the article on "Amazing Chair Makeovers". (OK, I'll admit it, the great colors on the cover caught my eye too!)
 
 
My friend, Anita, recovered this old chair for her home in Pemaquid Point, Maine. Last year, when she and her husband downsized, she gave it to me.
 
 
I had loved this sweet little chair in Anita's home and am now loving it in mine. It was exactly what I needed to complete this conversation grouping at one end of our (very long) living room. Every time I see it I think of good times we've had traveling with Anita and her husband, Fred.
 
 
This chair inspired my sister, Joanne, and I to re-do an old chair from our Mom's house last winter.
 
 
The inspiration chair cost $1199.00; we did ours for under $50.00. Here's our chair "Before". Or maybe I should say "During" as we'd already painted the wood and rattan frame.  You can read more about this project here.
 
 
And here's our finished chair. We were pretty happy with the results since we really didn't know what we were doing when we started!
 
 
I did quite a few posts  about the work Joanne and I did to update our Mom's condo. Now Joanne and her husband own the condo and are doing even more renovations. They're currently having new flooring installed in the guest room/study. Since the condo is on Casco Bay, the flooring they chose is a driftwood color.

View of Portland from the condo

Last weekend, Joanne and I were brainstorming color schemes for this room. (Well, mostly me . . . wait until she sees the inspiration swatches I taped al over her wall while she's been at work!)


One idea she had was to use neutral gray walls with bright yellow accessories.


That's where the HGTV chair article comes in. Mom had a wing chair very similar to the "before" chair below and Joanne saved it . . . temporarily camouflaged by a simple beige Sure Fit slipcover.

When I saw this photo I got excited to try my hand at amateur re-upholstery again. I could see this "after" chair in a gray and white fabric with the bright yellow legs and piping in Joanne's soon-to-be-painted guest room/office.
 

Here's another "ugly chair makeover" from the HGTV Magazine article that would also work well in a gray room.
 

I love how this chair came out too. It would add lots of color to a boring room.

 
This chair wouldn't work in Joanne's room but I'd love to see six of these around a dining room table!
 

I think I'm probably referred to by my sisters as their "ADD older sister", always coming up with projects for them to do. Now all I have to do is sell Joanne on my latest crazy idea. Maybe we'll soon be re-doing Mom's old wing chair for her new room


Get out the yellow paint and upholstery tacks, Joanne
Here I come!


Partying with:
Flaunt It Friday at Chic On a Shoestring
Feathered Nest Friday at French Country Cottage
Home Sweet Home at The Charm of Home
Party Junk at Funky Junk Interiors

Friday, February 20, 2015

7 Things That Make Your Home Look Dated?

I was browsing through the Huffington Post online when this article caught my eye: 7 Things That Make Your Home Look Dated. The article is written by Erin Gates who recently wrote a book on decorating called The Elements of Style. The article promises to help us avoid those "What Was I Thinking?" moments in the future.  I have LOTS of those, don't you?


Here's the list and my take on how my own home measures up.

Saturday, January 24, 2015

Wash, Dry, Decorate: Laundry Room Update

When we moved to our retirement condo on Applegate Lane, there was a stackable washer and dryer squeezed into a small closet in the first floor bathroom.  You could actually see it from the living room . . . definitely not a good look, even if I tried to pass it off as steampunk!

 
Our house is a 2-story with a gambrel roofline . . .


So we found wasted space under the eaves . . .

and moved the laundry room upstairs next to the master bedroom. 


Here it is!


Under the sloping wall, we added an area for folding clothes with lots of storage underneath, hidden by a fabric "curtain" threaded onto a length of heavy wire secured to the underside of the counter top by small eye hooks.
 

This space is also really handy for wrapping gifts and laying out fabric for sewing projects.


I love some of the photos shared by blogger Miss Kopy Kat in her recent post entitled  How To Transform a Laundry Room.  Her fabric treatment under the counter is similar to mine and also hides a storage area.  Her laundry room even includes a coffee station and wine bar!


If I had wine in my laundry room, DH and I would have the cleanest clothes in town!


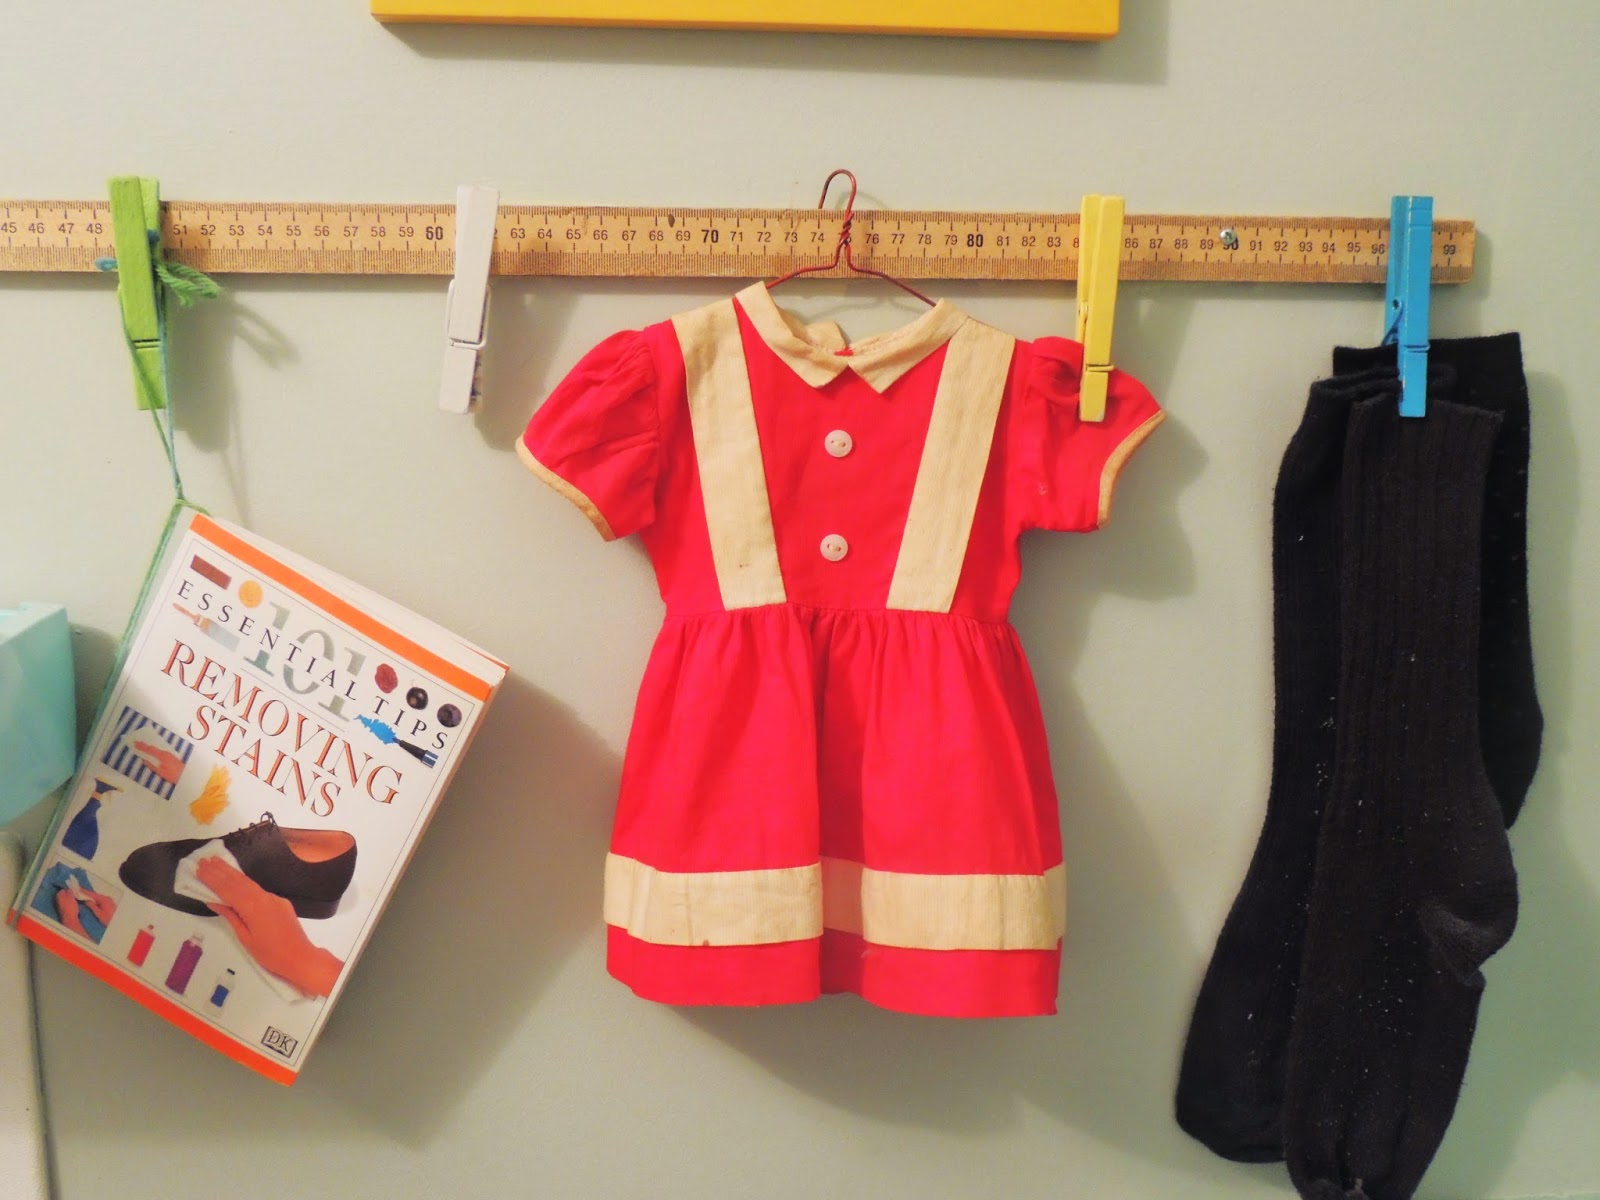
I hot-glued brightly-painted clothespins to a yardstick and mounted it on the wall between my dryer and folding area to hold those mystery socks that always seem to exit the dryer without their mates. The paper towel holder is handy for spills and a framed pattern envelope from the 1950's adds a little color and whimsy.  (How about those hats?)

 
On the opposite wall, I found room to hang a miniature clothesline to display a collection of vintage dolls' clothes.  
 

 An old apple ladder holds an antiques child's dress and an assortment of vintage wooden coat hangers. It's useful as well as decorative . . . I hang newly-ironed clothes on it until I put them away.


And the piece de resistance? A chandelier we rescued from the original porch of our former 1830's home. It's so unexpected in the laundry room that it just makes me smile!

Extra craft storage is hidden on a shelf unit behind the door where I can get to it easily. And there's room to leave the ironing board up all the time for quick touch-ups as clothes come out of the dryer.

 
 This room works perfectly and makes good use of formerly wasted space in our home.
 
Who says doing laundry can't be fun?


This post is linked to:
 Party Junk at Funky Junk Interiors
Show & Tell Friday at My Romantic Home
 
Related Posts Plugin for WordPress, Blogger...