Showing posts with label driftwood. Show all posts

Wednesday, January 9, 2019

Procrastination

Happy New Year from Maine! I haven't posted for almost two months and I apologize to my few, but loyal, blog friends. I love to write, take photos, decorate, or go on adventures and blog about them and I've missed doing it. I promise to do better in 2019!

Winter has arrived here in coastal Maine but it has been mild so far. This is our street; across from it is beautiful Casco Bay, which leads to the Atlantic Ocean near Portland (the "other" Portland!)

With my stair project done, you'd think I would have taken a break but . . . you'd be wrong. The stairs came out so good sans wall-to-wall carpet that I plowed right ahead and started on the second floor, which houses my craft room, our master suite, and a second-floor laundry.


Which required squeezing every bit of furniture, clothing, and decor into the laundry room and bathroom while we worked on the floors. What a mess!


Here is a "before"picture of our master before the icky old aqua carpet was removed. 


We replaced it with red oak flooring. It was quite a learning process for me as there are so many new flooring products on the market today. I had no idea about the virtues of vinyl planks vs. engineered hardwood vs. laminate and so on.  After lots of research and speaking with helpful professionals,  we chose red oak engineered hardwood to compliment the floors downstairs.


We did have the flooring professionally installed and it looks beautiful. What a change!
 Here it is in my craft room, one side . . . 

And the other.


When  the floors were done, I decided to add some curtains to the craft room. I love how "boho" and unexpected these are, with their mix of colors and textures.


And since I've been reading at my craft table (and I LOVE to read), I treated myself to my very own reading corner in the newly-floored craft room. I had the lamp, bought a little C-table at Home Goods for my books, and ordered the chaise from Wayfair.  FYI: This was my first purchase from Wayfair and I couldn't be more pleased; they sent free fabric samples when I was deciding on the fabric and shipping was free and fast. If you've never seen my craft room, here's a link to a post I did about it. I spend most of my time in this room!


By the time the second floor was back together, it was Thanksgiving. Literally. I love these little bottle-brush turkey place card holders I found at Home Goods. Only $1.99 each. I gave them to my sister as a hostess gift on Thanksgiving Day. Heck, she was doing the cooking this year!


We  had barely finished all the Thanksgiving leftovers when the Christmas season got started. The first two weekends in December are "Christmas Prelude" in Kennebunkport , a great time for Christmas shopping, fireworks, and catching up with old friends.


Speaking of Kennebunkport, I have to acknowledge the passing of President Bush #41. He will be missed by all of us who he considered his neighbors. I am a liberal Democrat but knew him to be an exceptionally honest and caring man. He will be missed.


And then it was Christmas . . . .


I spent all my time making Christmas gifts and not enough of it working on my blog. 
I love this stamp. I had it made at Staples and use it to make my own gift tags, gift bags, gift wrap and Christmas cards on plain brown paper. Simple to wrap or embellish with plain old garden twine.


I found these vintage Bingo cards at an antique shop in North Carolina last March. 


With some cut and paste and a little ribbon, they made tree ornaments, a holiday banner for our fireplace, and Christmas cards for special friends.


I posted Tips for Stenciling Flour Sack Towels in August and, between then and December 25th, completed 46 (OMG!) of them to give as Christmas gifts. I found images I liked on the Internet and cut my own stencils on Mylar using an Exacto knife. 


                    The Kitchenaide mixer stencil took awhile to cut out but it's my favorite.
                                      Whew! No wonder I didn't have time left to blog!


             And then there were the driftwood Christmas trees to finish . . . 

Homemade Maine Christmas folk art with driftwood collected in Searsport, Maine.


But on Christmas morning, all of the preparation was worth it.


After Christmas Day, a walk on Wells Beach was exactly what was needed to center myself again.

For the New Year, I decided to go crazy and cut off all my hair. Really!
Here we are before; halfway before anyway . . . 


And after. 
Short, sassy, and oh so easy!

And, ever the optimist, I rejoined Weight Watchers AND Planet Fitness for 2019. 
Hope springs eternal!

Last weekend, we had a great day outdoors at the farm of our friends Survivor Bob and Peg Crowley in nearby Durham, Maine.  

The occasion was the Crowley's annual "Christmas Tree Burning Party".

So much fun and so nice to be outdoors on a mild winter's day .


Which brings me to today.
I think we're actually caught up.
I promise to be less of a blog-procrastinator in 2019.

Happy New Year!


Saturday, March 31, 2018

How To Make a Driftwood Mirror

I've been searching for a driftwood mirror for my guestroom.
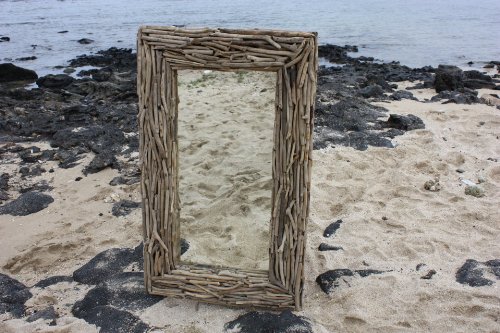
Something like this.


(Ah . . . advertising images. Don't you wish mirrors came out of the sea just like this? We could just walk the beach and collect them, already done!)


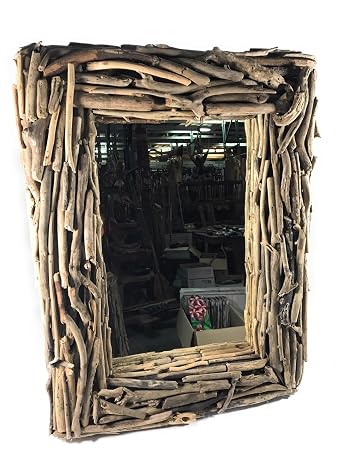
The driftwood mirrors I've looked at have been expensive. Pottery Barn has one, but the sale price is $423.00. This one is available at Amazon for $180.00 + $22.00 shipping. Not too bad.  
Related image


But I like a bargain. So I decided to make my own.
I'm lucky to live in Maine . . . 


 where it's easy to find driftwood on the beach.


I found a very heavy old mirror at Goodwill for $2.00. The maple frame was scratched but sturdy.


Aside from that, all that is needed is a glue gun.


I did burn my fingers quite a bit completing this project. Since  then, I went online and discovered these for $5.98 on Amazon. I haven't used them yet but have heard from other bloggers that they work, so I'm anxious to try them.

download

I looked for pieces of driftwood with interesting shapes, colors and textures.


And just hot-glued them to the old mirror frame.


That's it!
Total cost:  $2.00 plus a few glue sticks.


I love how the mirror came out!

It would be just as easy to do this project on a round mirror frame if that works better in your room.  Something like this .


If you don't have access to driftwood where you live, you could do a similar project with clothespins.
I love using them for projects with a farmhouse look.


Kirsty's Clothespin wreath, below (click link for tutorial) , could be made around a mirror. She used Washi tape on the clothespins. If they're old ones, I'd might just use them just as they are.

Hambly wreath - Photo 1

 A few years ago, I used my trusty glue gun to make a Button mirror . .  no beach required! This one was a little more time consuming but vintage buttons are fun. They're available everywhere, in shiny metals, unusual shapes and vintage colors. 


So, there you have it.  A simple project you can complete in an afternoon.  Or in an evening with a friend and glass of wine . . .


In which case, if all else fails, you can gather up your corks and make this!


Happy gluing!


This post is linked to:
Salvaged Junk Projects 421 at Funky Junk Interiors
Spring & Easter Blogger Link Party at Common Ground
Farmhouse Friday Link Party at The Painted Hinge
Flaunt It Friday at Chic On a Shoestring
Nifty Thrifty Sunday #328 at Nifty Thrifty Things
Happiness Is Homemade Link Party at The Painted Hinge
Craftastic Link Party at Sew Can Do

Related Posts Plugin for WordPress, Blogger...