Showing posts with label repurposing. Show all posts

Monday, February 4, 2019

12 Uses for a Vintage Washboard

When my friend, Mary Elizabeth, decided she was Moving To a Schoolhouse last month, she had to downsize in earnest. One of the (very few, honest!) things I rescued from her trash pile was a rusty old washboard.  And it didn't always look like this:


Here's how this little project started out. It was dirty and had so much rust on it that the interesting old lettering at the top was impossible to read.


I Googled " natural rust removers" and chose to try white vinegar and lemon juice. With the help of steel wool, a wet sanding block, and lots of elbow grease, they worked. I left on some rust just because I liked it! It was a messy job and it's freezing here in Maine right now so I did it at the kitchen sink after lining the counters on both sides with thick newspaper.


After most of the rust was removed. I rinsed the area well and set the washboard to dry overnight in front of our fireplace. The next day, I "prettied it up". The first step was oiling, and adding a little color to, the dry wood. I used Old English (Dark) for that. You apply it with a damp cloth and rub your brains out until you get the finish you like!


I let the Old English soak in and dry for an hour or two before completing the piece. I found this little wire basket at TJ Maxx for only $3.99 and purchased it to attach to the washboard (somehow!) to make it more functional. These baskets are pretty easy to find; I've also seen them at Home Goods and online.

I attached the basket with two small brown nails which I hoped would show - they didn't.


Then I just played around adding things that I thought would give this little project more uses: two antique coat hooks,


a wire across the front (you could use twine instead) to clip things to with mini-clothespins, and  two small screw eyes and wire across the back for hanging the piece from the wall.


And Voila! Done!
Now for the fun part: Staging it. I had so many ideas for how to use this little washboard turned wall art that my head was spinning! 


So here you go: My "Top Twelve" Ideas for Using a Repurposed Old Washboard (I bet you'll think of lots more!):

#1.  Storage for Hats, Mittens, Scarves in the Mud Room

(I'm writing this the day after the Super Bowl and we live in New England, so "Go Pats!")
#2.  Dog Accessory Organizer in the Mud Room
No staging on this idea because we no longer have a dog. But since we did have a Beagle, here's a cute one! My idea was to hang leashes from the coat hooks and use the wire basket for dog treats, a roll of doggie "poop bags" etc.  You'll have to use your imagination!
Image result for cute dog


#3. In the Laundry Room
A great place for lost socks and odds and ends of laundry supplies. Plus - how cute would this be on the laundry room wall?


#4. In the Guest Bathroom
(Heck - why not spoil yourself and hang it in your own bathroom!)


#5.  To Organize Your Greeting Cards  & Mailing Supplies


#6. To Display Plants, Inside or Out
I love this idea!


#7.  As a Reading Corner Next to Your Favorite Chair


#8.  To Display A Hobby or Collection


#9. In the Sewing Room


#10.  In a Farmhouse Kitchen


                            #11. To Display Favorite Dishes in the Dining Room


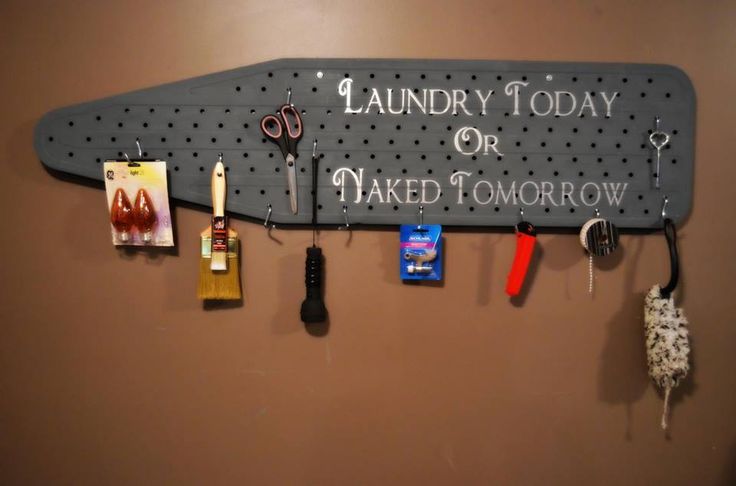
#12. And, of course, As a Message Board


I like all of these ideas so much that I think I'll have to hit the dump and flea markets and find myself eleven  ten (no dog!) more old washboards!
I can't wait to hear your washboard ideas. 
Leave me a comment?


p.s. My friend and felter-extraordinaire, Kathleen, just sent an e-mail comment on this post which included a photo of what she does with old washboards: felt on them, of course! Here is her latest creation, "Chloe". A work of art. Wow!


This post is linked to:
Inspire Me Tuesday #487 at A Stroll Through Life
Amaze Me Monday #300 at Dwellings
J & J Link Up Party #178 at Plucky's Second Thought
Homestyle Gathering 4 at My Wee Abode
To Grandma's House We Go Link Party #125 at Chas' Crazy Creations
Thursday Favorite Things at Follow the Yellow Brick Home
Feathered Nest Friday at French Country Cottage
Best of the Weekend link party at Calypso In the Country
Flaunt It Friday #434 at Chic On A Shoestring
Farmhouse Friday Link Party #92 at The Painted Hinge
DIY Salvaged Junk Projects #464 at Funky Junk Interiors
Vintage Charm Party 169 at My Thrift Store Addiction

Monday, October 8, 2018

Repurposed Ironing Board

My friend, and felter extraordinaire, Kathleen Gerdes, recently had a "Yard Fair" at her home - half Yard Sale and half Craft Fair.  My big purchase? A vintage wooden ironing board! I had no place for it, and no use for it (I'm downsizing, remember?,) but couldn't seem to leave without putting it in my car. I'm so glad I did!


It was leaning against the side of Kathleen's garage when I first spotted it.


Kathleen had planned to paint sunflowers on it but, like most of us, had just too many projects going and never quite got to it.


I loved that the original label was still on the underside of the board. And it was made right here in Portland, Maine. 


 I couldn't find a date on the label but, judging from the clothes and hairstyle of the lady ironing her husband's shirt (Wow, this really is an OLD ironing board!), it's  probably from the early 1900's.
Did they really iron back then?
Did they really iron in heels back then?


After moving my "new" ironing board all around the house, I decided to check the Internet for inspiration. Other bloggers always have great ideas! These two are from Floriane at Floriane Lamarie Blog. Designer Floriane writes in French but the blog has a "translate" button which works well. (Any way, I think "vieille table a repasser" sounds a lot better than "old ironing board", don't you?)


This one is from Anita at Cedar Hill Farmhouse.

This ironing board image is from Pinterest. It caught my eye because I have the same sign (thought I was the only one!). It reads simply, "Work Hard and Be Nice". I haven't really gotten into the "Live, Laugh, Love" sign trend but this one really speaks to me so it now lives in my kitchen to remind me of what's important. I love how this vintage ironing board is styled.


 And here's mine. There were so many places I could have used it but it has finally settled into my dining area, right off the kitchen. It will be great for displaying seasonal vignettes as well as for serving when I entertain.


DH just cut back the hydrangeas for winter. They dried right in my vase. Aren't they beautiful?


And if you happen to find a newer ironing board at a yard sale, how about this idea for your laundry room, again from Floriane Lemarie?

Décoration table à repasser

Even though I refuse to think about Christmas yet, I had to share this ironing board from Becky at Beyond the Picket Fence.  How about the "tree lights" coming through the steam vents?

Décoration table à repasser

Who thinks up this stuff?

 For now, I think I'll just stick with my old wooden model.


Yours in repurposing . . . 
A lot more fun than ironing!


This post is linked to:
Amaze Me Monday #284 at Dwellings
Talk of the Town #144 at Knick of Time
Inspiration Monday at Refresh Restyle
Share A Cup #310 at Mrs. Olson blog
Share Your Style #178 at The Red Painted Cottage
Farmhouse Friday Link Party #78 at The Painted Hinge

Thursday, April 26, 2018

Simple DIY Birdhouses

When DH and I were in England last June, I saw this birdhouse outside a little shop. I took a picture of it thinking it would be fun to make one like it when I got home.


Before I got started, DH cut out the birdhouse shapes for me on his table saw. 


Monday was a beautiful Spring day here (finally) so I invited a few of "the Girls" over to make the birdhouses.


These two ladies, Margaret and Jo, are sisters. They have lived in the same house in our little town their whole lives. I met them over coffee at Dunkin' Donuts and really enjoy their company, their stories . . . and their creativity. They got to work staining the birdhouses with exterior stain.


My sister-in-law, Lillian, and BFF, Mary Elizabeth kept busy using the drill press to drill a small hole in the bottom of each can. The cans need to be clean and dry. We used a metal file to make sure the open end was free of sharp metal edges that could hurt the birds (or us!).


I set up the spray paint area. Everyone brought half-full cans of spray paint they had on hand to contribute to the project.


Lillian and Mary Elizabeth got the brilliant idea of hammering paint sticks and tomato stakes into my lawn , putting a can on each one, and spraying them on there. Sure worked better that trying to hold each can up separately while painting our arms!


Does this look like fun or what?


The "Ladies" ended up with lots of great colors to choose from.


And I ended up with a polka-dotted front lawn!


A couple of the ladies decided to use acrylics to paint designs on their houses.


The last step is to use a washer and short wood screw to attach each pre-drilled can to the wooden back of the birdhouse. 


We also drilled a hole into the back of each house for hanging.


And Voila!


Eleven birdhouses completed, two bottles of wine consumed and a good time had by all!


 This was a perfect Spring project to share with friends!


This post is linked to:
Farmhouse Friday #54 at The Painted Hinge
Related Posts Plugin for WordPress, Blogger...