Showing posts with label Pottery Barn. Show all posts

Saturday, March 31, 2018

How To Make a Driftwood Mirror

I've been searching for a driftwood mirror for my guestroom.
Something like this.
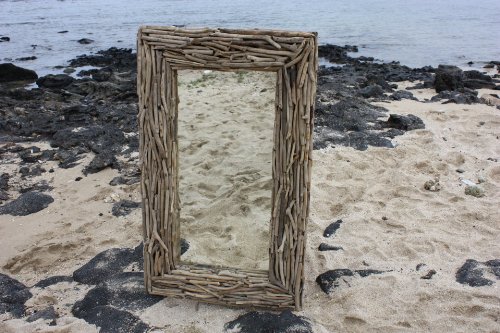

(Ah . . . advertising images. Don't you wish mirrors came out of the sea just like this? We could just walk the beach and collect them, already done!)


The driftwood mirrors I've looked at have been expensive. Pottery Barn has one, but the sale price is $423.00. This one is available at Amazon for $180.00 + $22.00 shipping. Not too bad.  
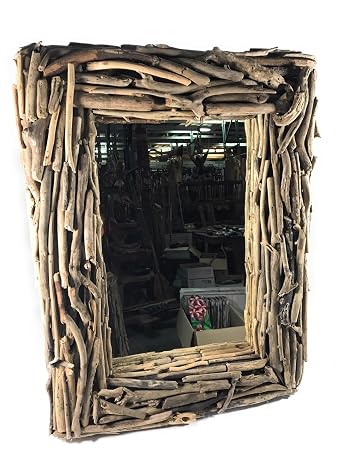
Related image


But I like a bargain. So I decided to make my own.
I'm lucky to live in Maine . . . 


 where it's easy to find driftwood on the beach.


I found a very heavy old mirror at Goodwill for $2.00. The maple frame was scratched but sturdy.


Aside from that, all that is needed is a glue gun.


I did burn my fingers quite a bit completing this project. Since  then, I went online and discovered these for $5.98 on Amazon. I haven't used them yet but have heard from other bloggers that they work, so I'm anxious to try them.

download

I looked for pieces of driftwood with interesting shapes, colors and textures.


And just hot-glued them to the old mirror frame.


That's it!
Total cost:  $2.00 plus a few glue sticks.


I love how the mirror came out!

It would be just as easy to do this project on a round mirror frame if that works better in your room.  Something like this .


If you don't have access to driftwood where you live, you could do a similar project with clothespins.
I love using them for projects with a farmhouse look.


Kirsty's Clothespin wreath, below (click link for tutorial) , could be made around a mirror. She used Washi tape on the clothespins. If they're old ones, I'd might just use them just as they are.

Hambly wreath - Photo 1

 A few years ago, I used my trusty glue gun to make a Button mirror . .  no beach required! This one was a little more time consuming but vintage buttons are fun. They're available everywhere, in shiny metals, unusual shapes and vintage colors. 


So, there you have it.  A simple project you can complete in an afternoon.  Or in an evening with a friend and glass of wine . . .


In which case, if all else fails, you can gather up your corks and make this!


Happy gluing!


This post is linked to:
Salvaged Junk Projects 421 at Funky Junk Interiors
Spring & Easter Blogger Link Party at Common Ground
Farmhouse Friday Link Party at The Painted Hinge
Flaunt It Friday at Chic On a Shoestring
Nifty Thrifty Sunday #328 at Nifty Thrifty Things
Happiness Is Homemade Link Party at The Painted Hinge
Craftastic Link Party at Sew Can Do

Friday, September 4, 2015

A Pottery Barn Inspired Bedroom Update

My sister and I spent the last two weeks of August decluttering, reorganizing and redecorating much of her home as she prepares for retirement in January.  We started with her new downstairs family room and "Andi room" and then moved upstairs for a living room re-do.  
 
All that was left was the Master Bedroom. We just finished that and I thought I'd share what we accomplished.  I think we learned, once again, that "Less is More".


Friday, August 28, 2015

Less Is More: Budget Living Room Re-do

If you've been following this blog, you know that I've been helping my sister prepare for retirement by decluttering and updating her newly-empty nest. She's been reorganizing using the KonMari method of keeping only "what sparks joy" in her home. Andi started with a major purge and the determination to "Collect Moments Not Things".
 
 
Now that her home is drastically decluttered, Andi is finally able to see the "bones" of her rooms and decide what she wants to put back, replace, or eliminate completely. This is the fun part!
 
Here's a peek at the newly-decluttered living room and a look at how we re-did it.
 

Thursday, August 20, 2015

Collect Moments Not Things

“ While you are alive, collect moments not things."   
                                                  ~Aarti Khurana

I've had a great time this year helping friends and family members declutter, reorganize and redecorate their homes. I've always loved to organize (my spices were in alphabetical order long before Fly Lady and Marie Kondo!), never pursued it as a career, but look forward to being asked to help others "spark joy" in their homes.


So far, "The Accidental Organizer" (me!) has had great fun this year helping to "reclaim" the homes of  BFF Mary Elizabeth, niece Katy, and (the current project) my sister, Andi. Andi and her DH both had homes before they were married so the first step was a major decluttering. We had both learned a lot from reading (repeatedly!) The Life Changing Magic of Tidying Up and Andi was determined to keep only those items which "sparked joy".

Friday, September 13, 2013

Home Staging 101

Selling our home in today's real estate market was difficult and frustrating. After  months on the market with no offers, we decided to enlist the help of a home stager, something still fairly new here in Maine.


I thought it would be fun to show you some of the "before & after" photos. Here is our family room before staging...


And after. The stagers removed all wall coverings and even window screens to maximize natural light. They replaced my patterned rug with a simple sisal one and accessorized using a combination of my things and theirs. We helped by cleaning, touching up paint, decluttering, and removing personal items like family photos.


Here is the living room before...

 
The house was built in 1830 and the stagers wanted to make it appeal to younger buyers. They explained that, even though it is an old house, Gen Xers prefer a simpler "Pottery Barn" look and that is what they tried to accomplish with staging. I really like the results (and I guess the buyers did too!)...


And finally our master bath. (What was I thinking when I painted it red???)


The stagers suggested a softer color palette. We did the painting, bought a few new towels at Target and voila! New paint color is Benjamin Moore Quiet Moments. I love the results...


Like many of us who love to decorate our homes, I thought I was pretty good at it. Working with  local stagers Elizabeth and Monique was a little bit humbling but worth it because it taught me a lot. As I decorate our home at Applegate, I'll remember what they taught me:
  • Keep it simple - Eliminate clutter; less is more.
  • Consider lighting - both day & night
  • Use a few big (really big) accessories rather than lots of small ones
  • Take risks - go ahead and try that antique spool cabinet next to a Crate & Barrel chair
I can't wait to show you more photos of Applegate as we continue to settle in and decorate. In the meantime, here's proof that I'm trying to apply what I've learned: a BIG accessory!.
 

Happy decorating!


Related Posts Plugin for WordPress, Blogger...