Friday, May 23, 2014

DIY Sofa Table...Perfect!

I really wanted a sofa table to finish off our living room at Applegate Lane. The challenge was finding one the right size for our room. To fit the space behind our couch, it had to be quite long, very narrow, and exactly 32" high. Having found nothing that worked locally, I decided to go on line for inspiration.

My fellow bloggers came through.  Cassity at Remodelaholic had a guest blogger,
Alicia from Thrifty and Chic, back in October of last year who posted plans for a simple sofa table
that I was sure DH would love to make for me. We found enough "already-aged with a perfect patina" wood at our local Habitat for Humanity ReStore...under $10.00 for all four pieces.


DH Hank was able to complete the sofa table in an afternoon...
Total cost:  well under $20.00 for wood, two brackets, nails and screws.


There are detailed directions and photos photos posted on the Remodelaholic blog.


And here it is... 


All done and ready for our "Gourmet" Mexican dinner party this weekend.
Hank did a great job!

 
 I think our new DIY blog-inspired sofa table really finishes off the living  room.
 
I'm doing a happy dance!
 
 
This post is linked to:
Show and Tell Friday at My Romantic Home
Upcycled Party Junk at Funky Junk Interiors
Home Sweet Home Party at The Charm of Home
Wow Us Wednesdays at Savvy Southern Style
 
Special thanks to:
 Alicia at Thrifty and Chic
Cassity at Remodelaholic


Thursday, May 22, 2014

A Mexican Dinner Party #1: Placecards and Prizes

Our infamous Gourmet group is getting together at our house this weekend for a belated Cinco de Mayo dinner. We're renaming it Vientecuatro (24th) de Mayo. Since we've been getting together for dinner for over thirty years, being a little late with a celebration is not a big deal for our group of old long-time friends.

I love the creative part of planning for "Gourmet". Our Mexican theme has kept me happily busy in the craft room this week. (Note the glass of wine in the middle of the desastre on my craft table!)


The placecards were simple to assemble from wine corks and decorated craft picks. I found lots of great ideas on Pinterest. One clever poster used real limes as the base for the picks instead of wine corks.

Here are the finished placecards. The Mexican flag picks can be found at about any party store and the tissue paper picks were at WalMart. I had to search a bit for the picks with the blank "flags" to write on...found them at Michael's.


I decided to translate everyone's names into Spanish for their placecards...hope they can find their seats!
 
 
On a recent visit to Belfast, Maine, we found a great store called Yo Mama's Home which, among lots of other fun things, had this Mexican party game on display. It's called La Loteria and is a Mexican version of Bingo. Needless to say, it came home with us.


Of  course there have to be prizes...los primios.  Most are actually made in Mexico thanks to the internet and Yo Mama's.


I wrapped the prizes in little "flag bags" to add to the excitement of playing la Loteria!


Everyone will go home with a goody bag too...a chillin' Margarita glass, some Hot Tamales, and a box of Tres Leches cake mix.

The Tres Leches could be a whole other blog post. The short version is that we fell in love with Tres Leches  (translates as Three Milks) cake at a Cuban restaurant in St. Augustine when we visited our friends, Anita and Fred, there in December.

photo courtesy of broowneyedbaker.com
 
Who knew that it actually is available in a mix in supermarkets the Southwest? Anita and Fred brought us this box back from Texas; I ordered six more boxes from Amazon, which now sells ethnic food in their "Pantry". Probably not as good as the real thing, but a fun Latin party favor.

 
Now that the placecards and favors are ready, it's time to start cleaning mi casa (my absolute least favorite part), setting the table, and preparing la comida...the food!
 
 
This post is linked to:
 Home Sweet Home at The Charm of Home
Show & Tell Friday at My Romantic Home

Sunday, May 18, 2014

Weaving a Wattle Fence

Last weekend I learned that if you can do this (and who among those of us "of a certain age" couldn't still make one in our sleep?)...


You can do this.


Wattle fences were used in medieval times and are defined as "consisting of rods or stakes interlaced with twigs or branches".


Wattle fences aren't as common in America as in England...except in Searsport, Maine, of course, where anything is possible.

Last weekend, we joined our friends Astrig and Steve at Searsport Shores to help them clean-up their campground for Spring. My friend Anita and I took on the challenge of finishing the wattle fence near the art studio. Before last weekend, I didn't even know what a wattle fence was...now Anita and I were weaving one!


Thankfully, it had been a rainy week and there were plenty of damp fallen branches around the campground to use. Anita's husband, Fred, helped by trimming some of the larger ones for us.


 While we wove outside, our Fiber College friend, Alice, was busy threading a loom inside the art studio.


And while we were all weaving...
 
and posing with our finished fence...


Hank and "the guys" were felling dead trees...


Saving bear-bothered bees...


And cleaning out "Cheryl's Green Shed" for the last time (I hope!).


After a day of hard work, Astrig and Steve always reward us with food and wine (smart campground owners!) They built an outdoor beehive oven behind the art studio over the winter so dinner was homemade flatbread pizza with fresh herbs.


Anita took her turn at the oven...

While Alice and Astrig prepped the flatbread.

Is it any wonder we come back here every year? Great friends, great food, creative work...


and the ocean right outside our camper door.
 
We're weaving memories!
 

Thursday, May 1, 2014

Making May Baskets

On this dreary, rainy week, I decided to make May baskets.

 I remember making them as a child and leaving them on friends' door steps on May 1st. I even remember dancing around a Maypole festooned with streamers in elementary school.
The celebration of May Day seems mostly forgotten now.
 

The tradition of the May basket, as my British-born Mom and grandmother explained it, was to leave a basket at a friend's door, knock or ring the bell, and run away. May Baskets were supposed to be given anonymously and, if you were caught at the doorstep, you had to kiss...which could have been a good or bad thing, I suppose...but, as a kid, kissing sounded pretty scary. So, we ran as fast as we could.

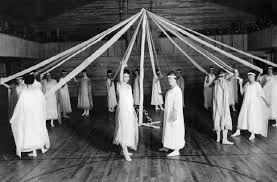
Nope...I'm not quite old enough to be in this photo!
I don't know if it's the "occupational therapy" aspect of crafting...the concentration and busy hands...or the fun of surprising people but, the May Baskets cheered up both the crafter (me!) and the twelve people who received them this morning.

 
To make them, I started with a package of 12" doilies and  2 large sheets of poster cardboard from Walmart. I had ribbon and a bin of odds and ends of silk flowers on hand.

 
I used my Mexican casserole dish as a pattern for cardboard circles a little smaller than the doilies...
 
And rolled each cut-out cardboard circle into a cone shape, about the size of a good-sized ice cream cone.


The next step was to glue a doily segment to each cone, creating the "basket" part of the May basket. White school glue or Modge Podge works well for this step.

When the glue dried, I punched two holes in each cone, opposite each other at 9 o'clock and 3 o'clock. Later, a loop of ribbon will be pulled through these two holes and tied off to make a "door hanger" for each May basket.

 
 Now the fun begins...filling the baskets. I used a few drops of hot glue in the bottom of each "basket"
 to hold the flower stems in place. Some people add little candies to the baskets too.
 
  
The printer came in handy for making little "Happy May Day" tags to tie on each basket. I found that  colored oak tag worked better than printer paper for the tags.
 

And that's it...a ribbon for a hanging loop, a bow or sticker for embellishment, and the baskets were done.
 
 
The plan was to follow tradition and hang the baskets on doorknobs but pouring rain forced me to improvise. Some of the baskets were left in mailboxes or hung inside screen doors in plastic bags...some were just handed out...and a few times I was "caught"...but it was all good!
 
 Here are my May Baskets ready for delivery.  
 

 Are you wondering who got the baskets?
 
Here's my list:
The nice young woman who gets my coffee every morning at Dunkin' Donuts, my 94 year old (very sweet) mother-in-law, my daughter and two of the amazing staff members at her group home, my sisters and sisters-in-law, my hairdresser. and my macho-man trainer at the gym (he's going to "pay it forward" and give it to his girlfriend).
 
 
It was so much fun giving the May Baskets away that I only wish I'd had time to make more.
 
Happy May Day!
 
Related Posts Plugin for WordPress, Blogger...