Tuesday, December 24, 2013

Images of Christmas Past


Feeling sentimental on this Christmas Eve day so thought I'd share some of my personal favorite Christmas memories...

Andrea and I with our new baby sister, Nancy Ann, on Christmas Eve 1952...


And the BIG year...We still talk about the Christmas we got our "Walking Dolls"...1953.
Nancy was walking by then too!


Nancy's Letter to Santa...1960.
She asked for Mr. Machine, a Barbie, and Moon Rocks!
 

"Aunt Nancy" reading "The Night Before Christmas" to Robert & Brian, 2001.


The way I'll always remember Nancy...
 
She loved Christmas.
  
  
My daughter, Kristen,  still believes...

 
My son, Rob...
and my "daughter", Tomomi.
 
I helped Rob hang his stocking in 1972...


And steadied his son Takanori after he hung his in 2005.
 
Taka's letter to Santa...
They don't seem to differ much from one generation of children to another.
  
 
(except for "Furthermore"???)
 
Grandson Toshinori,  "nephew" Thomas,  GrandsonTakanori...
 
 and sweet Grandaughter, Miyo Alice.


Cricket reads a story to granddaughter, Anna.


 As Hank and I finish the baking and get ready to pick Kristen up and load the sleigh for our Christmas Eve visits, we wish each of you a very Merry Christmas in a world at peace.


This Christmas, we are missing our friends...
 
Ron Lambert...July 5, 1943 - Dec. 19, 2013
 
and
 
John Goddard...1943 - 2013
 
I know that Nancy probably already has both of you laughing in heaven this Christmas Eve...or at least she's baking heavenly cookies for you!


Monday, December 23, 2013

Top 10 List of Gift Wrapping Headaches


It all starts out looking so easy...the wrap is color coordinated, the craft table is organized, the equipment is laid out as if it belongs in the surgical suite at Maine Medical Center...


And then, in the blink of an eye, I find myself in gift wrap H*ll. 
 
It happens every year.
 
 
So I've come up with my Top 10 List
 of
Things That Make Me Crazy About Wrapping Holiday Gifts:
 
#10.  No matter how many gifts you have wrapped, you will always find one more. There is no escaping this truth...don't even bother trying.
 
#9.  That super-duper extra-long roll of gift wrap will always run out on the fourth side of the biggest box.
 
#8.  Toy manufacturers have secretly plotted to package toys in open-front cardboard packages with angles previously unknown to modern geometry.
 
#7.  The time it takes to wrap a gift is inversely proportional to the time you have left to get it done.
 
#6. Wherever your _______ (insert your favorite: coffee, cat, ink, etc.) is, it will find its way to the front of the package you have just wrapped.
 
#5.  Like maps,  gift wrap tissue is impossible to fold flat once it has been opened. Just give it up...can't be done. Stuff the leftovers in a bag and move on.
 
#4.  The term "stick-on bows" is an oxymoron. They either have backing that is impossible to peel off or, once "un-backed", simply don't stick.
 
#3.  If a box has six flat sides, the idiot person in the store will have placed the huge, ugly sticky price tag on the one that shows the most. This is especially attractive on the front of  a book or picture frame. (OT: And what's with price stickers on fruit??? Every tomato I own has a hole in the side!)
 
#2.  It often takes more time to remove the price sticker from a gift than it does to wrap it. There should be a special place in h*ll for the person who designed the sticky price tags used at Home Goods, Marshall's and TJ Maxx that come apart in those frustrating little circles.
 
#1.  And my top gift-wrapping frustration???  Getting the gift all wrapped and forgetting who it's for.  Guess there's no one to blame but myself for this one!


So here are a few tips to compensate for the frustrations listed above: 
  •  "Goo Gone" is a gift wrappers best friend.
  • Have your glue gun hot and handy when wrapping...great for sticking on recalcitrant bows or adding tags and embellishments.
  • Have everything boxed up before starting to wrap.
  • Choose colors of wrap and ribbon that all work together, and...
 
  • Pour yourself a big glass of wine or Bailey's before you begin. Repeat as needed.
AAAAh! 
 
 
Done!
 

Hang in there, fellow wrappers, the holiday finish line is finally in sight!


Linking to "Inspire Me Tuesday" at A Stroll Through Life

Saturday, December 21, 2013

DIY Vintage Camper Ornaments

Need a last minute gift or unique package tie-on? If you've got some felt scraps in your stash, you're all set! 
The inspiration for my ornaments came from...
 
 
our first camper, a little orange "Tab".

  
My sister and her husband have a Tab, too. Theirs is red and decorated with New England Patriot logos. I knew I'd have to make an ornament in their colors too!


I made my pattern on Mylar. I found lots of vintage camper photos to help me along in one of my favorite "eye-candy" books, Sisters On the Fly. This little book is loaded with stories and photos of women who restore, decorate, and travel together through the west in vintage campers.
I aspire to join them someday.


The book also includes recipes, but I was looking for simple camper graphics, like this one.


Sometimes I just use objects from around the house to inspire a project of pattern...like these camper lights from the garage.


Once you're sufficiently inspired, sketch your pattern onto oak tag, cardboard, or, in this case, Mylar. If you're like me, you'll want to have an art eraser handy!


 Next, cut out and label your pattern pieces.


Pin pattern pieces to a layer of iron-on Pellon to add stiffness. Some crafters use a layer of cardboard instead...your choice.

 
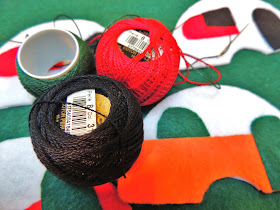
I ironed Heat 'n Bond onto the felt I planned to use for the smaller trim pieces so that I could iron them onto the camper body, holding them in place until I added the decorative embroidery. If you plan to use this, it's easier to iron the Heat 'n Bond to the whole felt square before cutting out the pieces.


Next, pin the pattern pieces to the felt, in the colors you have chosen for the body and trim.  
Remember to place the pattern pieces upside down for the back if you are making a two-sided ornament.


I outlined the trim pieces of my ornaments with embroidery using a simple running stitch or, on some, a blanket stitch. This is optional if you have already adhered your trim pieces with Heat 'n Bond but I like the finished look the embroidery adds..
 
My ornaments are about 4 inches long; you can design your pattern to be any size you like. Don't worry if you draw the pattern too big or too small the first time, just use your printer to shrink or enlarge it. Easy-peasy!

 
My neice, Katy, and her friend, Kelly, came over one snowy day to make ornaments with me. They are both twenty-somethings on a tight budget and worked all day making ornaments for Christmas gifts. Instead of campers, they made adorable cocktail ornaments from Pinterest at this link...


and fortune cookies from a blog called Just Call Me Mommy. The fortune cookies were originally designed for Valentine's Day but Katy and Kelly made them in Christmas colors and wrote Christmas greetings inside. They were easy (just little folded circles of felt) and came out great!

They even left a fortune cookie for me!


 I found these little charms in the jewelry-making section of Michael's Craft Store and sewed onto each ornament to personalize the gift. Each charm says, "Made with Love". The ornaments are hung with loops of red and white Baker's twine.


And there you have it...a whole RV Park full of vintage campers for the tree!

 
Here are ours...


Adding memories of camping trips gone-by to our tree.

 
Now I think I'm almost done...???
 
Merry Christmas!


Wednesday, December 18, 2013

8 Fashion Mistakes???

According to the style section of the Huffington Post, there are 8 Fashion Mistakes That Instantly Age You.  Whew! Only 8???
 
 I think I may be making all of them at the same time.
 
Here goes:
 
1. I'll-fitting bras.
" The right bra size can instantly lift and smooth you, giving you a flattering silhouette from the get-go."
 
This recent photo (at St. Augustine beach in December!) is a two-fer... I'm demonstrating mistakes #1 and #2 in the very same picture!
 
2. Cropped, ill-fitting capris.
"Think Audrey Hepburn or Jackie O. While wide-leg, full-length pants are flattering, wide capri-length pants can cut off the leg line and make you look more stumpy than stunning. Try a pair of capris that has a narrow opening and just grazes the top of ankle – tres chic."
 
 
 Jackie O.? Audrey Hepburn? Tres chic?
Je ne sais pas!
 
3. Twin Sets.
"We know, we know—twin sets are easy and cover your arms. But these days matchy-matchy equals a major snooze-fest."

 Shoot...and I just bought these last winter.

"Oh, and it's time to lose the coordinating scarf, too!"

How did they know???
 
4. Jersey Fabrics.
"But when you're shopping for a special occasion, avoid wearing this thin, clingy fabric; it naturally hugs the body, not always highlighting our best assets."
 
Busted!
 

5.  Always wearing black pants.
"Try trading in your safe (read: boring) slacks for a shimmering skirt that you can dress up or down depending on what you decide to wear on top. You’ll look instantly refreshed."
 
 Do black jeans count?

6. Overly sensible shoes.
 
You mean like these???
 
"With a kitten heel you'll feel stylish and comfortable."
 
Sorry, Huff Post, but here's as close as I come to a kitten heel.
 
 
7. So-called "granny" glasses.
 
"Avoid the classic stereotype of a granny with kooky reading glasses dangling on strings from her turtleneck. Instead embrace the sexy age of geek chic. Opt for thicker, Ernest Hemingway-style frames and leave the delicate wire-frames or rimless frames behind."
 
Before...
 
After???
 
 
8. Missing out on tech accessories.
 
"Let your electronics play up your personality by accessorizing them with patterned cases and covers."
 
A recent photo of my tech accessories.
 
 
Next Up?  "Top 5 Fashion Mistakes That Age You"  (You're going to love this one!!)
 
So...I was 8 for 8 on this list, which means that I must look like I'm 102!
 
How did you do???